This is by far my favorite tool, I use this little baby all the time! I remember before the Big Shot debuted, when you wanted to dry emboss you needed to use a light table and brass stencils and all the fussy cutting of images, I don’t miss that at all!
The Big Shot retails for $110.00 and includes two standard cutting pads and platform. You may have sticker shock with the price, it is a lot to spend but this tool is worth every penny! The amount of time saved, plus all the awesome things it can do with it make it a must have purchase that you will use for years to come! If you would like to know how to reduce the cost by 50%, let me know I would be glad to help you!
Now let’s get started with a simple card using both framelits and a textured embossing folder. This tutorial will show the most popular ways to use the Big Shot; to emboss and to cut out images.

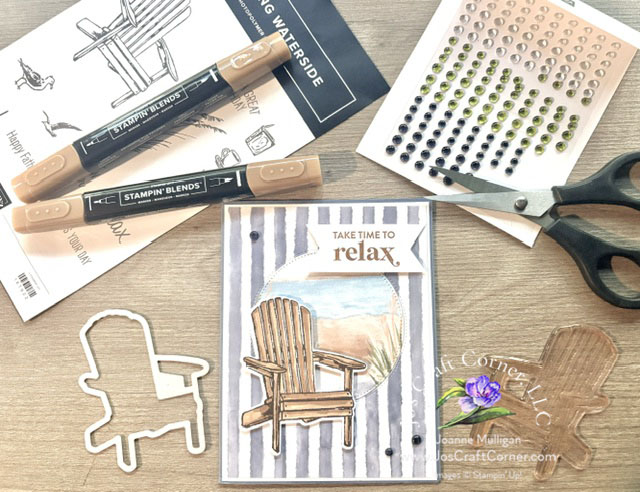
Clockwise from left: Cupcake Cutouts Framelits, Confetti Textured Embossing Folder, Standard Platform, Big Shot Machine, Finished Project, Magnetic Platform, Standard Cutting Pads, Sweet Cupcake Set.
First let’s start with embossing!
If you have been stamping as long as I have, you will remember the only way to dry emboss was to use those fancy little brass stencils and the light table plus you had to be near an outlet. The Big Shot eliminates all that so it is completely portable. I have even taken mine camping!


You will need a Textured Impressions Embossing Folder or TIEF for short. Here, I am using the Confetti TIEF. I love this folde with how the confetti acts as a frame. You will note one side has indentations and the other side has raised images, this is what will create the embossed effect when the two sides are pressed together. Simply open the folder and slide the cardstock inside, then close it up.


Now we are ready to run this through the Big Shot. You will be using a standard platform and two cutting plates, making a little embossing “sandwich”. If you have an older platform like me it has several tabs with each one used for a different function. Tab 2 is used to cut framelits and thinlets and Tab 1 is for embossing. Flip open to Tab 1 and place one cutting pad on the platform. The new platforms available through Stampin’ Up! no longer have the tabs. Now add your TIEF on top, then place the other cutting pad on top of the TIEF. You have now created your “sandwich”. Slide it into the Big Shot as shown, grab the handle and crank away. This is my favorite part, it will pull it along as you crank, squishing the two sides of the TIEF together making a perfectly embossed panel! So much quicker that tracing those brass stencils isn’t it?


After embossing my panel I wanted the raised images to stand out a bit so I sponged the panel with Soft Sky classic ink and a sponge dauber. Then I stamped the greeting using Chocolate Chip classic ink.
Next up, cutting out a stamped image with the framelits! You will need a set of framelits, I am using Cupcake Cutouts which coordinates with the Sweet Cupcake stamp set. And bonus…they are available as a bundle! Not only can you save 10% when ordered as a bundle but during the month of July, my personal monthly special is purchase any bundle in the current catalog you will receive a FREE bottle of Stampin’ Mist!
Taking another trip down Memory Lane, when you wanted an image to pop off the card you would stamp and then grab those scissors and cut away. I can vividly remember making Christmas cards one year. I loved my design only thing I didn’t think of when creating one card was all the cutting I was going to have to do for forty cards. I can tell you by about the tenth card my hand was cramping and I was beginning to wonder what I was thinking with all that cutting. Not so bad with one but forty…yikes!! If I had a Big Shot I would have had those little images cut out in records time!

To make the cute little cupcake, I stamped the image first on scrap cardstock using the Sweet Cupcake set, Soft Sky and Chocolate Chip Classic ink. FYI- For my Sunday Share next week, I will be showing how to use the 3-step Sweet Cupcake photopolymer set to get that beautiful realistic shading! Make sure you follow me so you know when a new post is available!! After the image is stamped it is now time to cut it out.


For framelits I use the magnetic platform. Since they are made from metal when you place them over your stamped image they will “stick” to the platform. This will reduce the risk of having the framelit shift so you get a perfect cut every time! If you haven’t invested in the magnetic platform yet, you can tape down the framelit with a little piece of washi tape or the sticky side of a small post-it note. You want to make sure you use something that will be easily removed from the paper without tearing it.
Now we are going to make another sandwich. Place a cutting pad down on the magnetic platform. You might notice all the cut marks, I have two sets of cutting pads. One set I use for framelits and the other set for embossing only. Next comes the stamped images. Take note the framelits have a flat side and a raised side. It is very important that the raised side is placed down over the image with the flat side facing up. Take care to line up the framelits over your image. If you’re using the magnetic platform it will stick in place if not be sure to secure the framelit as described above. After the framelits are in the right spots cover with the other cutting pad. Again you made another “sandwich”! When cutting out images, I like to run it through twice to make sure it cut through. I crank it one way and then reverse before I take it out of the machine. And viola your images are perfectly cut out!


Once everything was cut out, I went over the images with Wink of Stella in clear to give it a little shimmer. Then I assembled the card using a Soft Sky card base, Chocolate Chip panel then the embossed panel. Finally I attached the cupcake with dimensionals to make it pop!
And here is the finished card….

Thank you for visiting today! Be sure to check back often, I am in the process of updating several pages including …drum roll….video tutorials! A little nervous about that but I know once I get through one video I will be OK. And anyone who knows me, knows I love to talk!
Happy Stamping!
~Jo
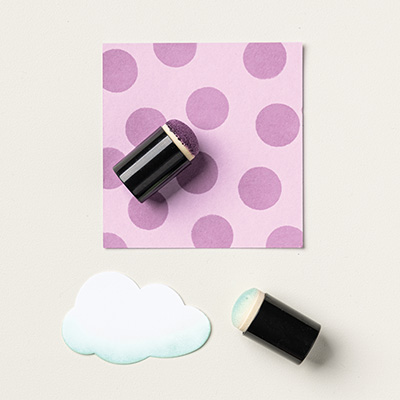
Items used in todays share: